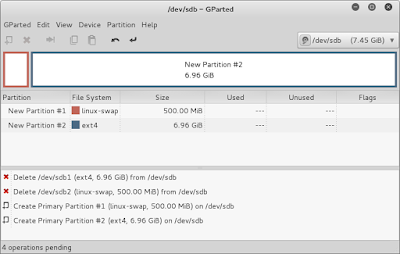
First take a USB drive (the tutorial suggests a 16gb USB stick, but I'm using 8gb in this tutorial) and format it such that the first partition is a 500mb swap and the remaining partition is ext4. I did this in Kali and the utility gparted. Here is a screenshot of what gparted looked like.
Next, download the OpenWRT firmware that is appropriate for the MR-3040 here.
Using the ethernet cable plug the MR3040 into a computer. Authenticate to the router by navigating to 192.168.0.1 and use admin/admin as the credentials.
Navigate to the Firmware Upgrade endpoint by clicking on System Tools on the left hand side to expand those options. Then click on Firmware Upgrade.
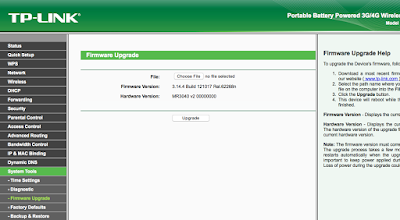
Click on the Choose File button and select the openwrt-ar71xx-generic-tl-mr3040-v2-squashfs-factory.bin file you downloaded earlier.
Click Upgrade. A confirmation dialog will appear and the MR3040 will proceed to be flashed with OpenWRT.

After the flashing process finishes, the MR3040 will reboot. After flashing the MR3040, the default IP address gets updated to 192.168.1.1 instead of 192.168.0.1. Access the newly flashed MR3040 by pointing your browser to 192.168.1.1. You may have to disconnect your host computer from your home Internet connection while this happens since 192.168.1.0/24 is a common network for home routers.
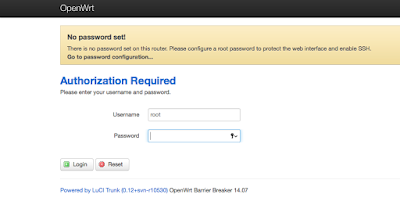
After pointing your browser to 192.168.1.1 you can authenticate to the MR3040 with a username of root and a blank password.

The next task will be to install packages the will enable the MR3040 to interface with the USB drive. In order to do that we will need to get Internet access for the MR3040. In this case, I used the MR3040 to connect to my home wifi network. To do this I clicked on Network and then Wifi. Then I clicked on Scan to have the MR3040 identify my home wifi network.

After the scan identified my home wifi network, I clicked on Join Network. The next screen asks for the passphrase, allows you to set a network name, and configure firewall rules. I left the network name as the default wwan, and the firewall rules to wan which was empty for me. Another screen comes after this which confirms all of the details and I clicked on Save & Apply.
Next, open a terminal and telnet into the MR3040. You should not have to supply credentials at this point.
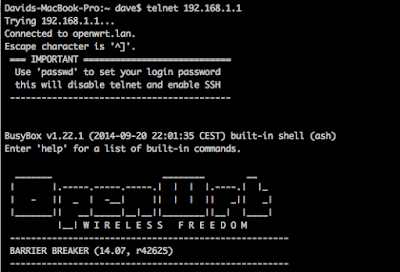
Confirm that you have Internet access by pinging 8.8.8.8. DNS is not working properly at this point though, so we'll need to update the network configuration for the br-lan interface. Configure the /etc/config/network file and add the line, option dns '8.8.8.8' to the entry for the lan interface. It should look like this:
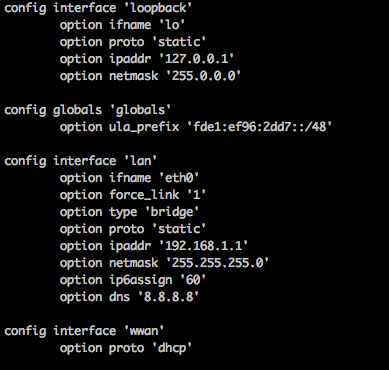
Reboot the MR3040 by typing reboot -f and when it comes back up telnet back in and attempt to ping a domain name. It should work this time. Now we should be able to update the MR3040 appropriately. From your telnet session, type opkg update to update the list of packages that can be installed. Now we'll install all of the packages for USB by typing: opkg install kmod-scsi-core kmod-usb-storage block-mount kmod-lib-crc16 kmod-crypto-hash kmod-fs-ext4
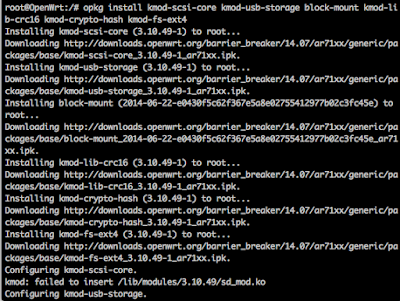
Insert the USB stick in to the 3G port and reboot by typing, reboot -f from the telnet session. Telnet back into the MR3040. Our next task is to get the MR3040 to recognize the USB drive. We'll do this by modifying the /etc/config/fstab file. First make a backup of the file and then proceed to edit fstab until it resembles this:
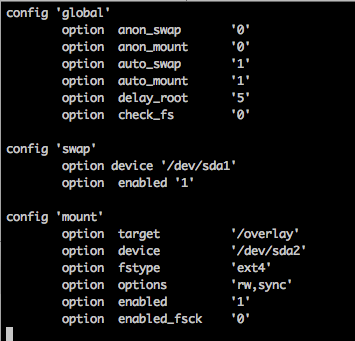
Then copy the contents of the flash memory on the MR3040 onto the USB drive with the following commands:
mkdir -p /tmp/cproot
mount --bind / /tmp/cproot
mkdir /mnt/sda2
mount /dev/sda2 /mnt/sda2/
tar -C /tmp/cproot -cvf - . | tar -C /mnt/sda2 -xf -
umount /tmp/cproot
Then update /etc/config/fstab so that the MR3040 will use the USB drive as the root folder. Update /etc/config/fstab so it resembles this:

Reboot the MR3040 by typing reboot -f again. Now we will verify that the MR3040 is identifying the USB drive correctly by typing, df -h, to look at the disk space usage. You should see that /dev/sda2 is there and has gigabytes of space available.

Now we will install the MiniPwner overlay. Change directory into /tmp and download the overlay with this command, wget http://minipwner.com/images/Overlay/minipwner-overlay_2.0.0.tar.
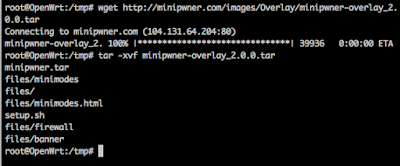
Extract it with this command, tar -xvf minipwner-overlay_2.0.0.tar. It appears that the setup.sh that got archived in this tar was edited using Windows style line endings. Edit the setup.sh file and manually delete the dos line ending ^M characters at the end of each line. I attempted to set the file format to be unix, using :set ff=unix, but was unsuccessful. Save setup.sh and execute it with, sh setup.sh. Flip the 3-way switch to be WISP and reboot.
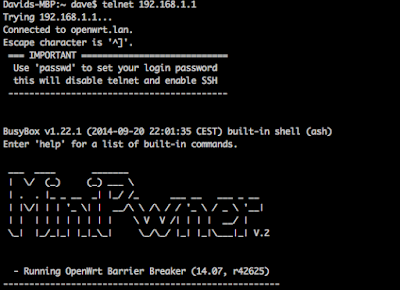
Telnet back in and you should be welcomed with a MiniPwner banner instead.
Now we will go through the process of installing security related packages. Type, opkg update, to update the list of packages the MR3040 is aware of. Next install the packages with the following commands (I ran into a character limit on the terminal so I had to split it up into two commands):
opkg install libpcap libstdcpp libpthread zlib libopenssl libbz2 bzip2 terminfo libnet1 libpcre libltdl libncurses librt libruby wireless-tools hostapd-common-old kmod-madwifi ruby uclibcxx libnl libcap libreadline libdnet libdaq libuuid libffi python-mini openssl-util kmod-tun liblzo libevent2-core libevent2-extra libevent2-openssl libevent2-pthreads libevent2 aircrack-ng elinks ettercap karma kismet-client kismet-drone kismet-server netcat nmap openvpn-easy-rsa openvpn-openssl perl samba36-client
opkg install samba36-server snort tar tcpdump tmux yafc wget python vim unzip
If you want to install any other packages at a later date, be sure to run, opkg update, before attempting to opkg install your desired package.
Finally, don't forget to run the passwd command to set a password, disable telnet, and enable SSH. The next time you try to remote into your device you will have to use SSH to access it.